Unreal Engine Tutorial
Alpha
This feature is currently in ALPHA. Additionally, Perforce compatibility is still being tested. We're interested in hearing your feedback. Please direct all feedback to support.
The Unreal Engine Conductor plugin allows for the simple submission of Unreal scenes via Media Render Queue to render on Conductor.
This tutorial will cover everything from installation to the download of rendered frames.
Note
It is recommended by Epic to use the latest video drivers available to properly run Unreal. Submissions may fail with older drivers.
Installing the Plugin
The Conductor Submitter for Unreal is a Python package (ciounreal) that needs to be installed using the Python installation that ships with Unreal. There are two main ways to install the Plugin.
Companion App
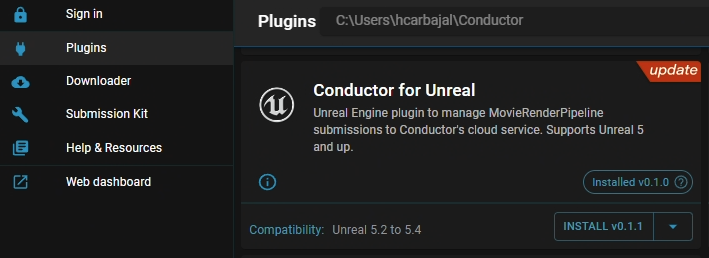
The recommended way to downloaded the Submitter is from the Companion App's Plugins Page. This option installs the Conductor Submitter to all available Unreal version on your machine.
FAB Marketplace
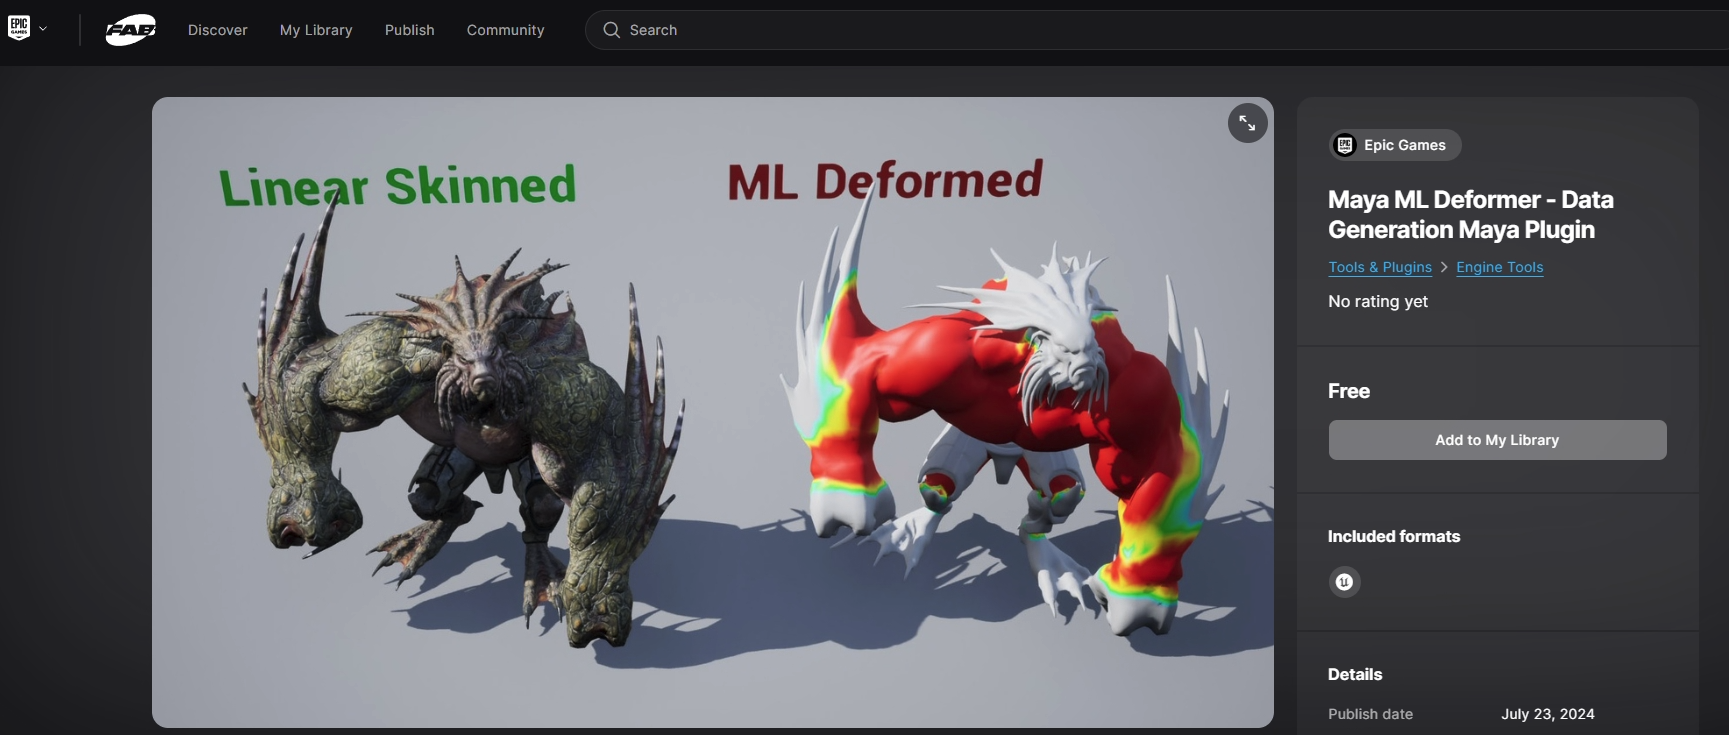
Alternatively, the Submitter may also be downloaded from the FAB Marketplace. Navigate to the listing and click "Add to my Library" on the right.
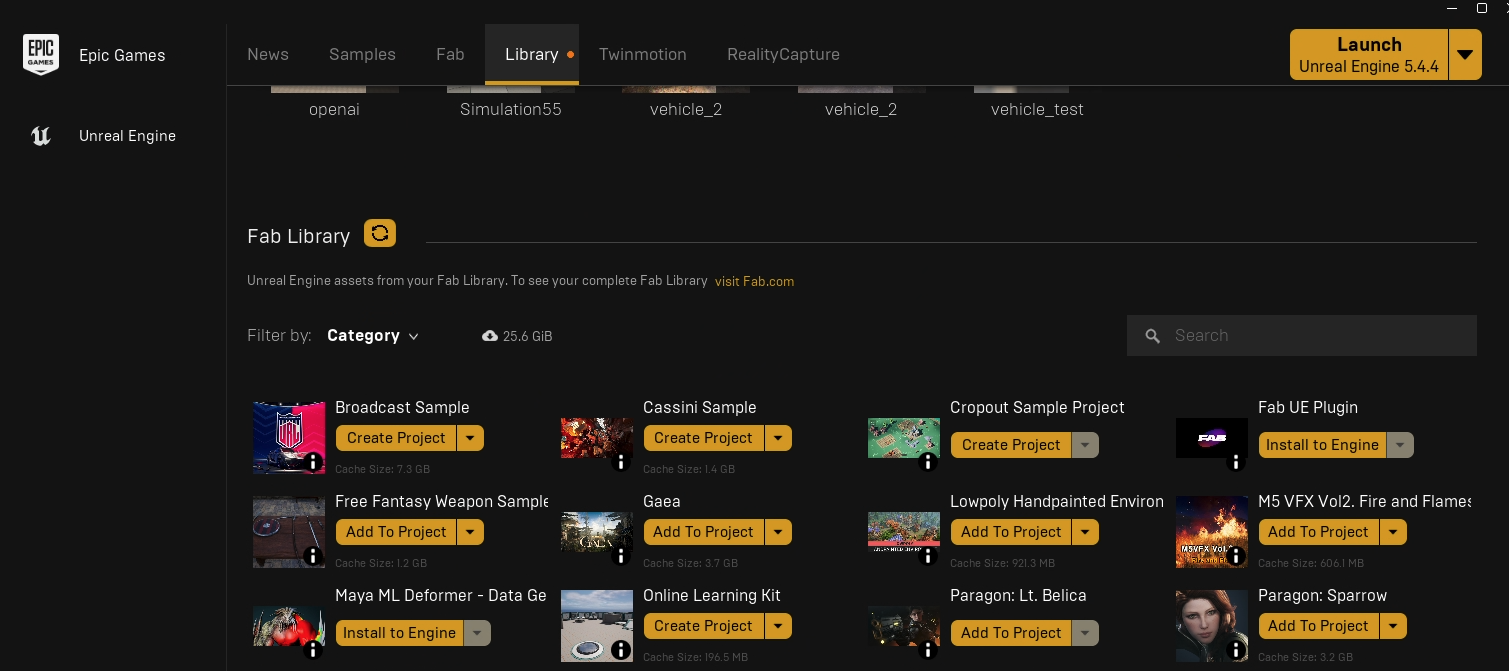
After the plugin has downloaded, navigate to the Epic Games Launcher>Library>Fab Library section and look for the "Conductor Rendering" plugin. If the plugin does not show up, you may need to hit the "Refresh" button next to the Fab Library title.
Please note for FAB downloads, users must have pip install enabled to download Python library dependencies.
Load the Plugin
- Open the Plugins panel, search for render and enable the Conductor plugin. After it is enabled for the first time, there will be no need to do so again.

With the plugin enabled, the executors must be properly configured to submit jobs to Conductor.
-
Open Project settings and search for Movie Render. Under the Plugins - Movie Render Pipeline section change the following:
- Default Local Executor -> MoviePipelineConductorLocalEditorExecutor
- Default Remote Executor -> MoviePipelineConductorRemoteExecutor
- Default Executor Job -> ConductorMoviePipelineExecutorJob
-
With the proper executors selected close the project settings window.

Note
In order to reconnect a Conductor account, open the Project Settings and search for Conductor. Select the Reconnect button that appears.
There is also a shelf button available for easy reconnection.


Configure Perforce Settings
Perforce offers an alternative to CoreWeave cloud storage for managing project file synchronization. Please ensure that your Perforce Server has been set up adequately by your administrator to use Conductor.
This may mean adding render node IP address ranges to the firewall rules to allow render node server access. IP address ranges may be found here for the following cloud providers: CoreWeave, GCP, AWS.
Please also note that when Conductor syncs with Perforce, the render node will open a temporary workspace during the render execution. This is relevant if your Perforce Plan comes with a limited number of Workspaces.
Follow these steps to set up Perforce for submissions:
-
Connect to the P4 server:
- Use the P4V application
- Log in with P4 user credentials
-
Set up P4 workspace:
- Create a workspace for the current project
- Place the workspace in the designated project location
-
Configure the Source Control plugin:
- Open Revision Control
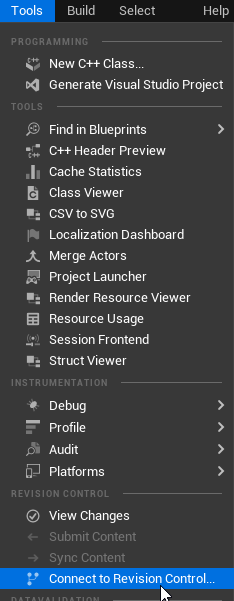
Open Revision Control
- Open Revision Control
-
Set Provider as "Perforce". Server and username should be fetched from P4V connection. Select Workspace that contains the proper project.
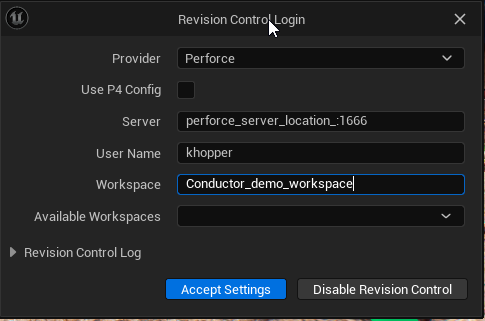
- Accept the settings. A success message will be displayed with a green check mark. Reload the project for the Perforce settings to commit.
Note
Proper configuration of the Source Control plugin settings is essential for ensuring the Plugin functions correctly with your Perforce setup.
Setting up a submission.
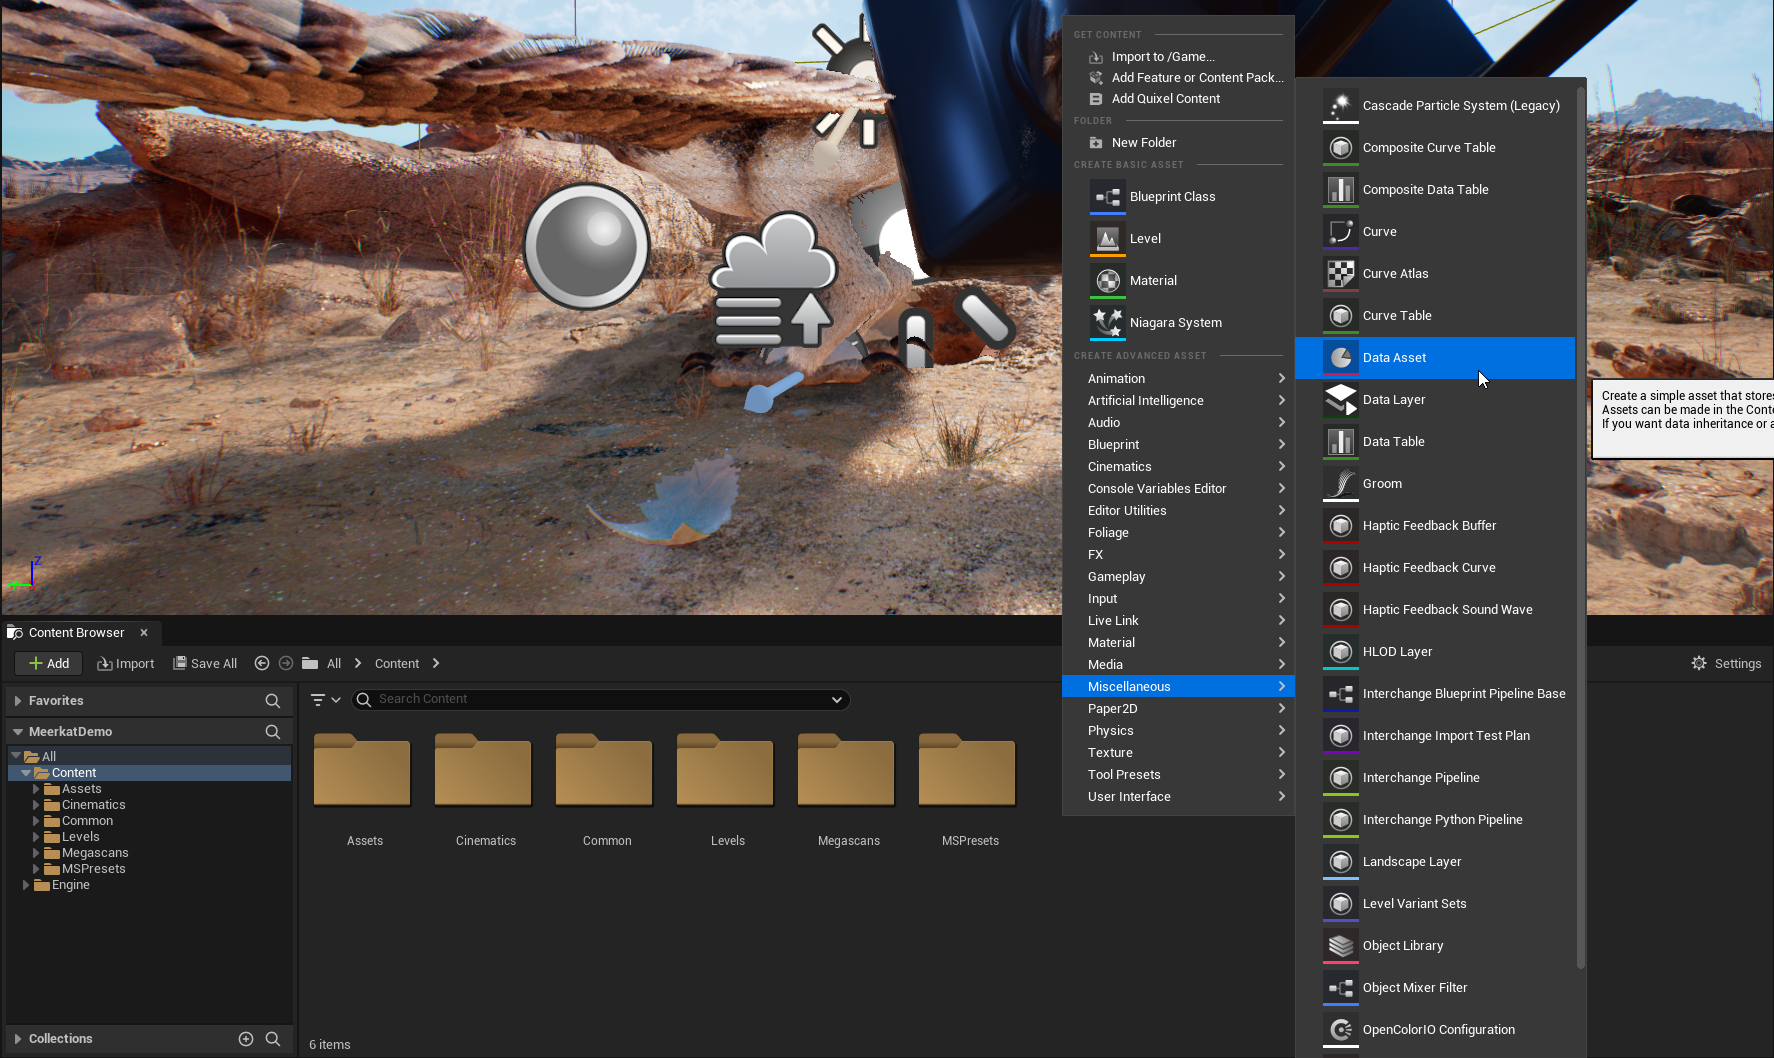
- Open the Content Browser window. In any location suitable for a Data Asset Right click -> Miscellaneous -> Data Asset. Select Conductor Settings as the class, and provide it any name.
-
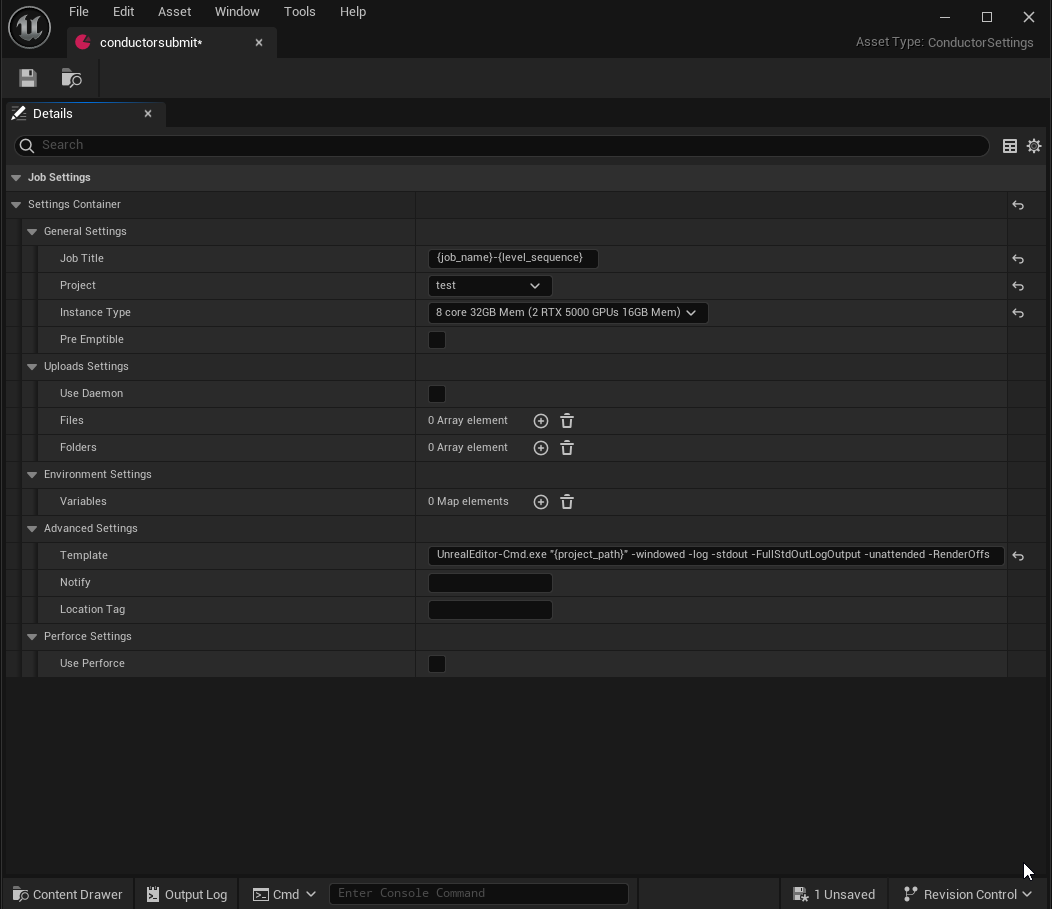
Double click the new Data Asset to configure the desired Conductor settings.
-
Set the Project and instance type to be used
-
Add any additional files or Environment variables required
Note
If using Perforce enable the Use Perforce checkbox. Manually configure the Perforce server field if needed.
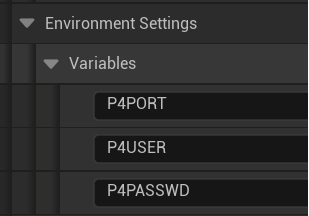
Expand the Environment Settings section to provide the required Perforce Environment Variables.
-
P4PORT - Which server should be connected to in order to sync project files
-
P4USER - Which user should be used
-
P4PASSWD - with which credentials
- Once The Data Asset is configured, save it via File -> Save, or use CTRL + S.
Submit a Job to Conductor
-
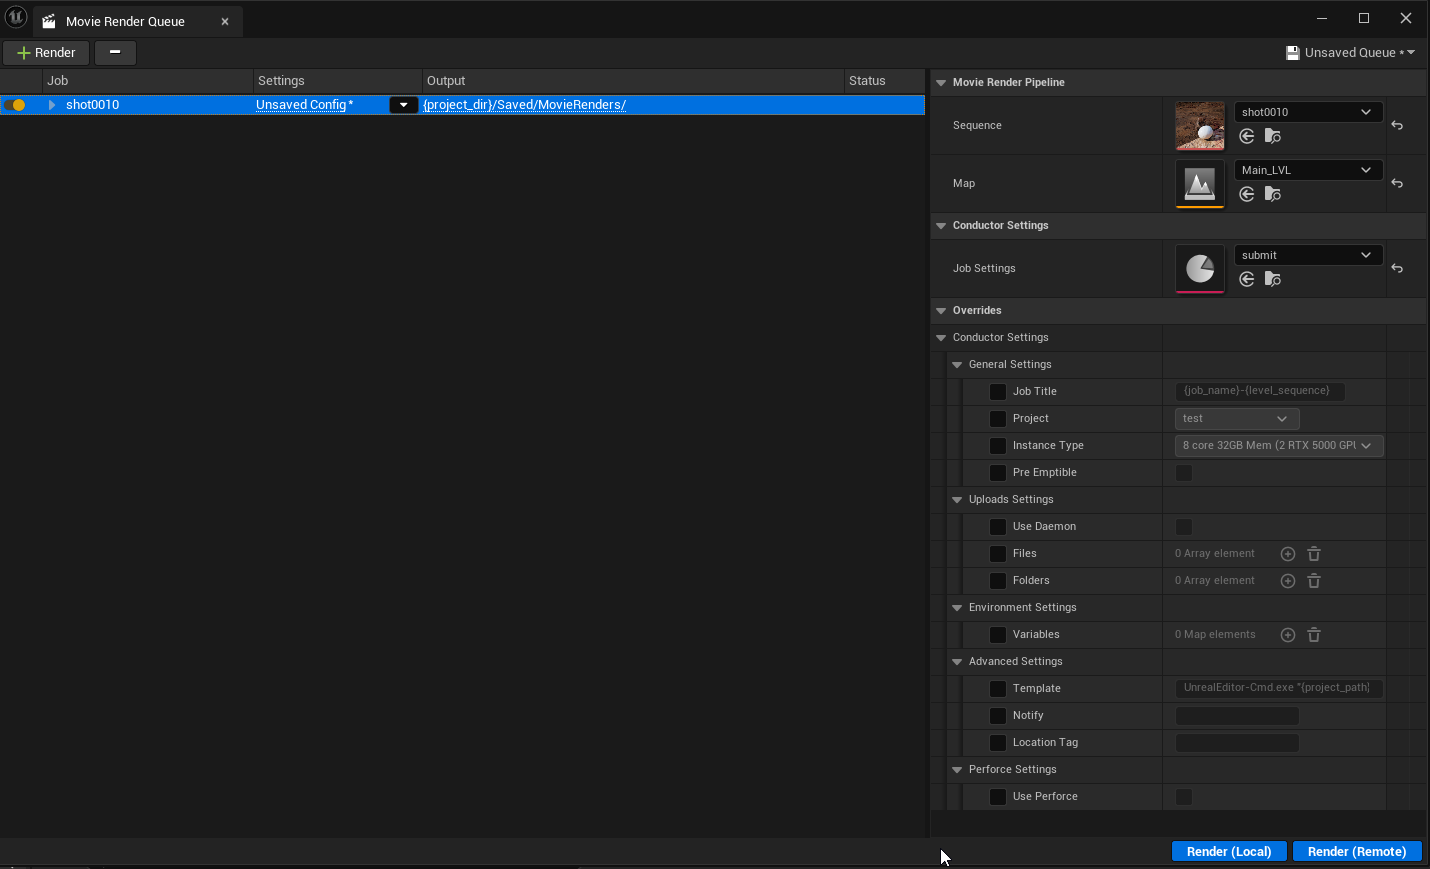
A submission can now be sent from Movie Render Queue to Conductor.
-
Open Movie Render Queue. Window -> Cinematics -> Movie Render Queue.
-
Select the scene(s) and levels to be submitted for render.
-
In the Job Settings field, select the Data Asset created in steps prior.
-
Provide any Submission overrides if required, and select Render (Remote) to submit to Conductor.

Download finished files
As tasks finish, you can download your images via the command-line tools or open the Downloader page in the Companion app.
Support
If there are any issues or questions about submissions please contact conductor Support.
Troubleshooting
Please visit our reference page for assistance troubleshooting.