Blender tutorial
The Blender submitter is an add-on that allows you to configure and submit jobs to Conductor.
This tutorial will get you up and running. For a detailed description of the plugin, please check the Blender reference page.
If you haven't already done so, Download the Companion App.
- Open the Companion app on the Plugins page and install the Blender add-on.
Load the Conductor Render Submitter add-on
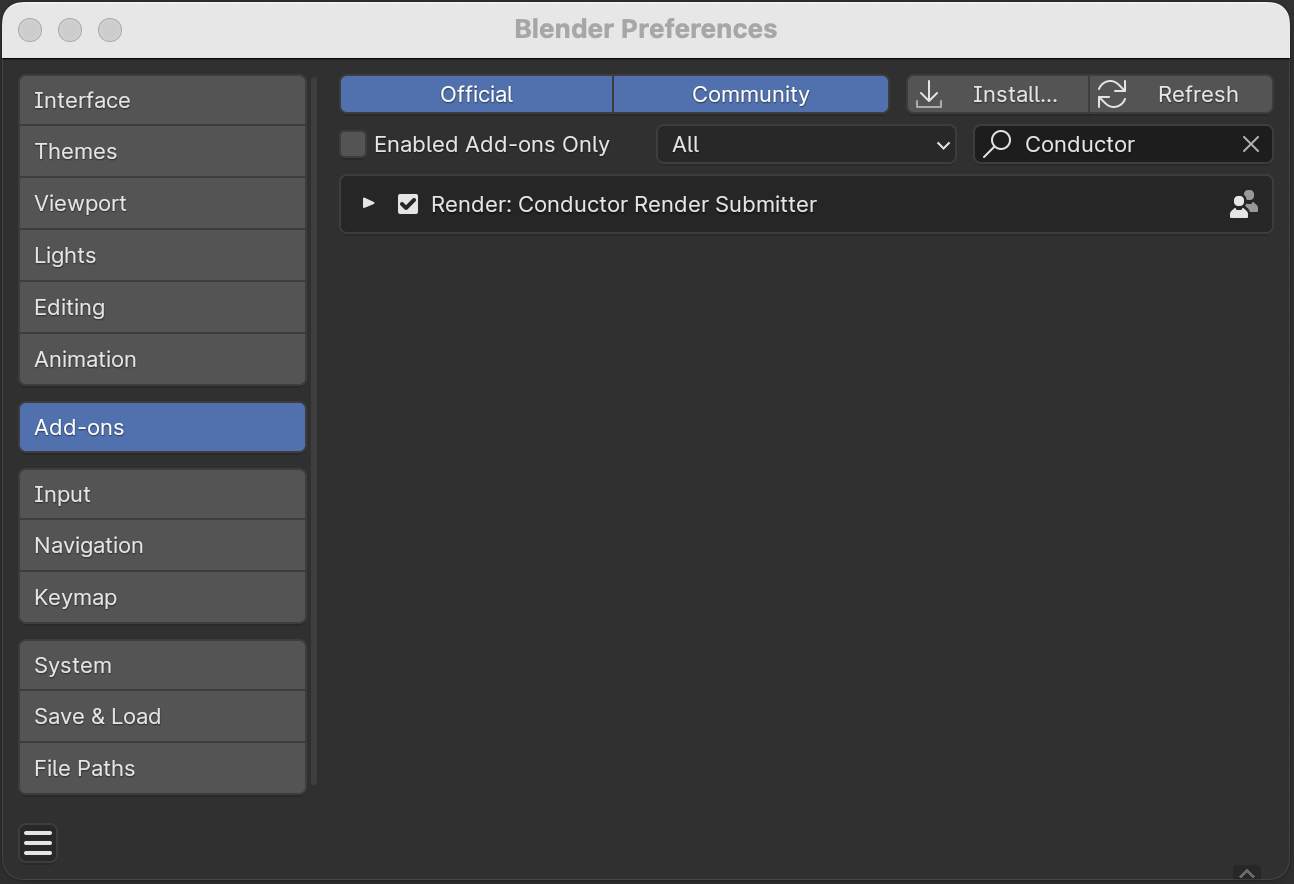
- Relaunch Blender and navigate to Edit->Preferences->Add-ons.
- Click the "Refresh" button to confirm that you are accessing the most recent version of the "Render: Conductor Render Submitter" add-on.
- Proceed to enable the "Render: Conductor Render Submitter" add-on.
- Switch over to the "Rendering" workspace, where you'll find the "Conductor Render Submitter" panel.
Connection
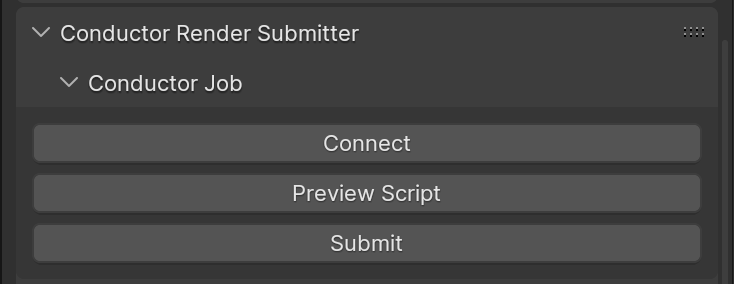
- Open the scene you want to render.
- Within the Conductor Render Submitter panel, click on Connect. This connects to your account on Conductor and you may be asked to sign in. It fetches the list of projects, packages, and instance types available to you. You'll notice the respective dropdown menus become populated.
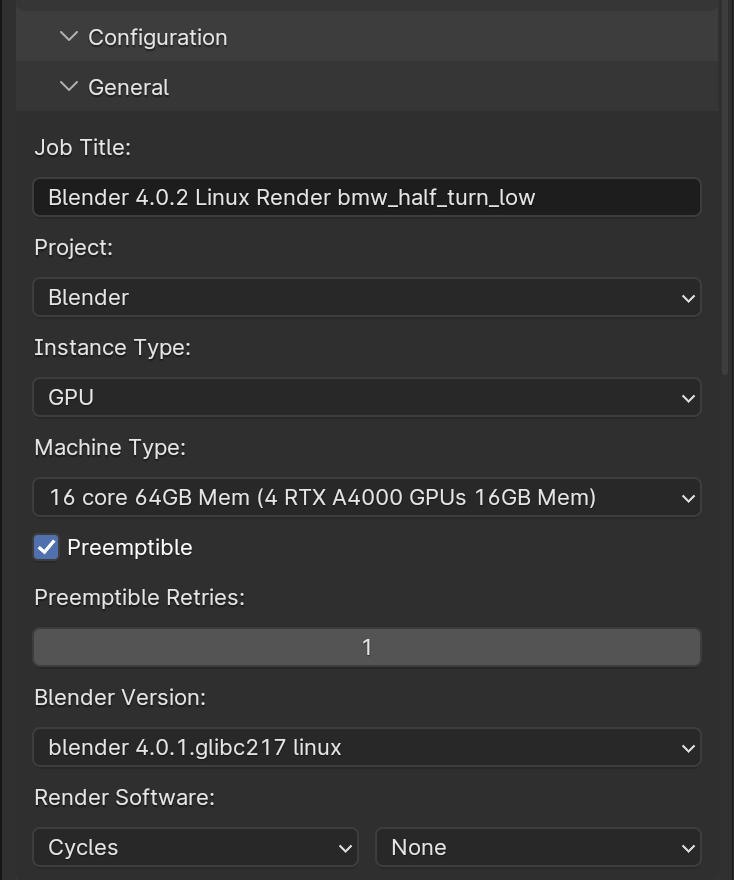
General Configuration
-
You have the option to customize the default job title, which will be displayed on the Conductor dashboard upon job submission.
-
For faster and more efficient rendering, especially with Cycles, choosing an Instance Type of GPU is highly recommended. If you're working with Eevee or Redshift, selecting an instance type of GPU is crucial, as these renderers depend entirely on GPU power.
-
Choose a suitable machine from the Machine Type drop-down menu.
-
Select the Blender version for your job, which might differ from your local version. Note that this choice affects available features, renders, and add-ons.
-
In the Render Software section, choose your preferred rendering software. By default, Blender's built-in renderer, Cycles, is selected.
Render Settings
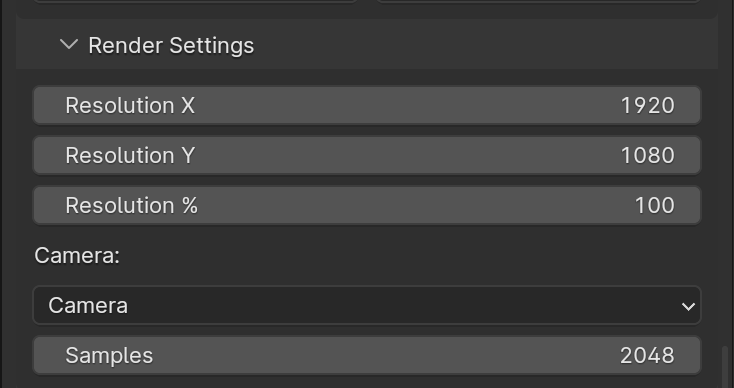
Adjust render settings like resolution X & Y, resolution percentage, camera selection, and sample count specifically for your job submission. These customizations are exclusive to your submission and won't alter your original Blender scene.
Frames
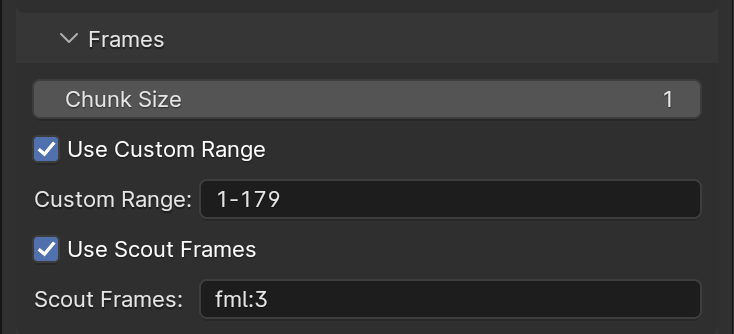
Initial Steps with Scout Frames
-
Begin your rendering process by utilizing scout frames to check render quality without processing the entire sequence.
-
Set "fml:3" to render the first, middle, and last frames (e.g., frames 1, 51, 100 for a 100-frame range), and keep the chunk size at 1.
Full Rendering Setup
After verifying quality with scout frames:
- Deactivate Scout Frames to prepare for full rendering.
- Choose Chunk Size based on scene complexity:
- For complex scenes, select a chunk size of 1-5.
- For simpler scenes, a chunk size of 10-20 is recommended.
Custom Frame Range
You have the option to override the Blender scene's frame range
Enable Custom Range if needed. Specify the frame range, such as "1-100", using sequences, individual numbers, or ranges with steps (e.g., "1,7,10-20,30-60x3,1001").
Add-ons
Select add-ons compatible with your chosen Blender version, noting that changing the Blender version updates the list of available add-ons and their versions. Choose the most suitable add-on and version for your project.
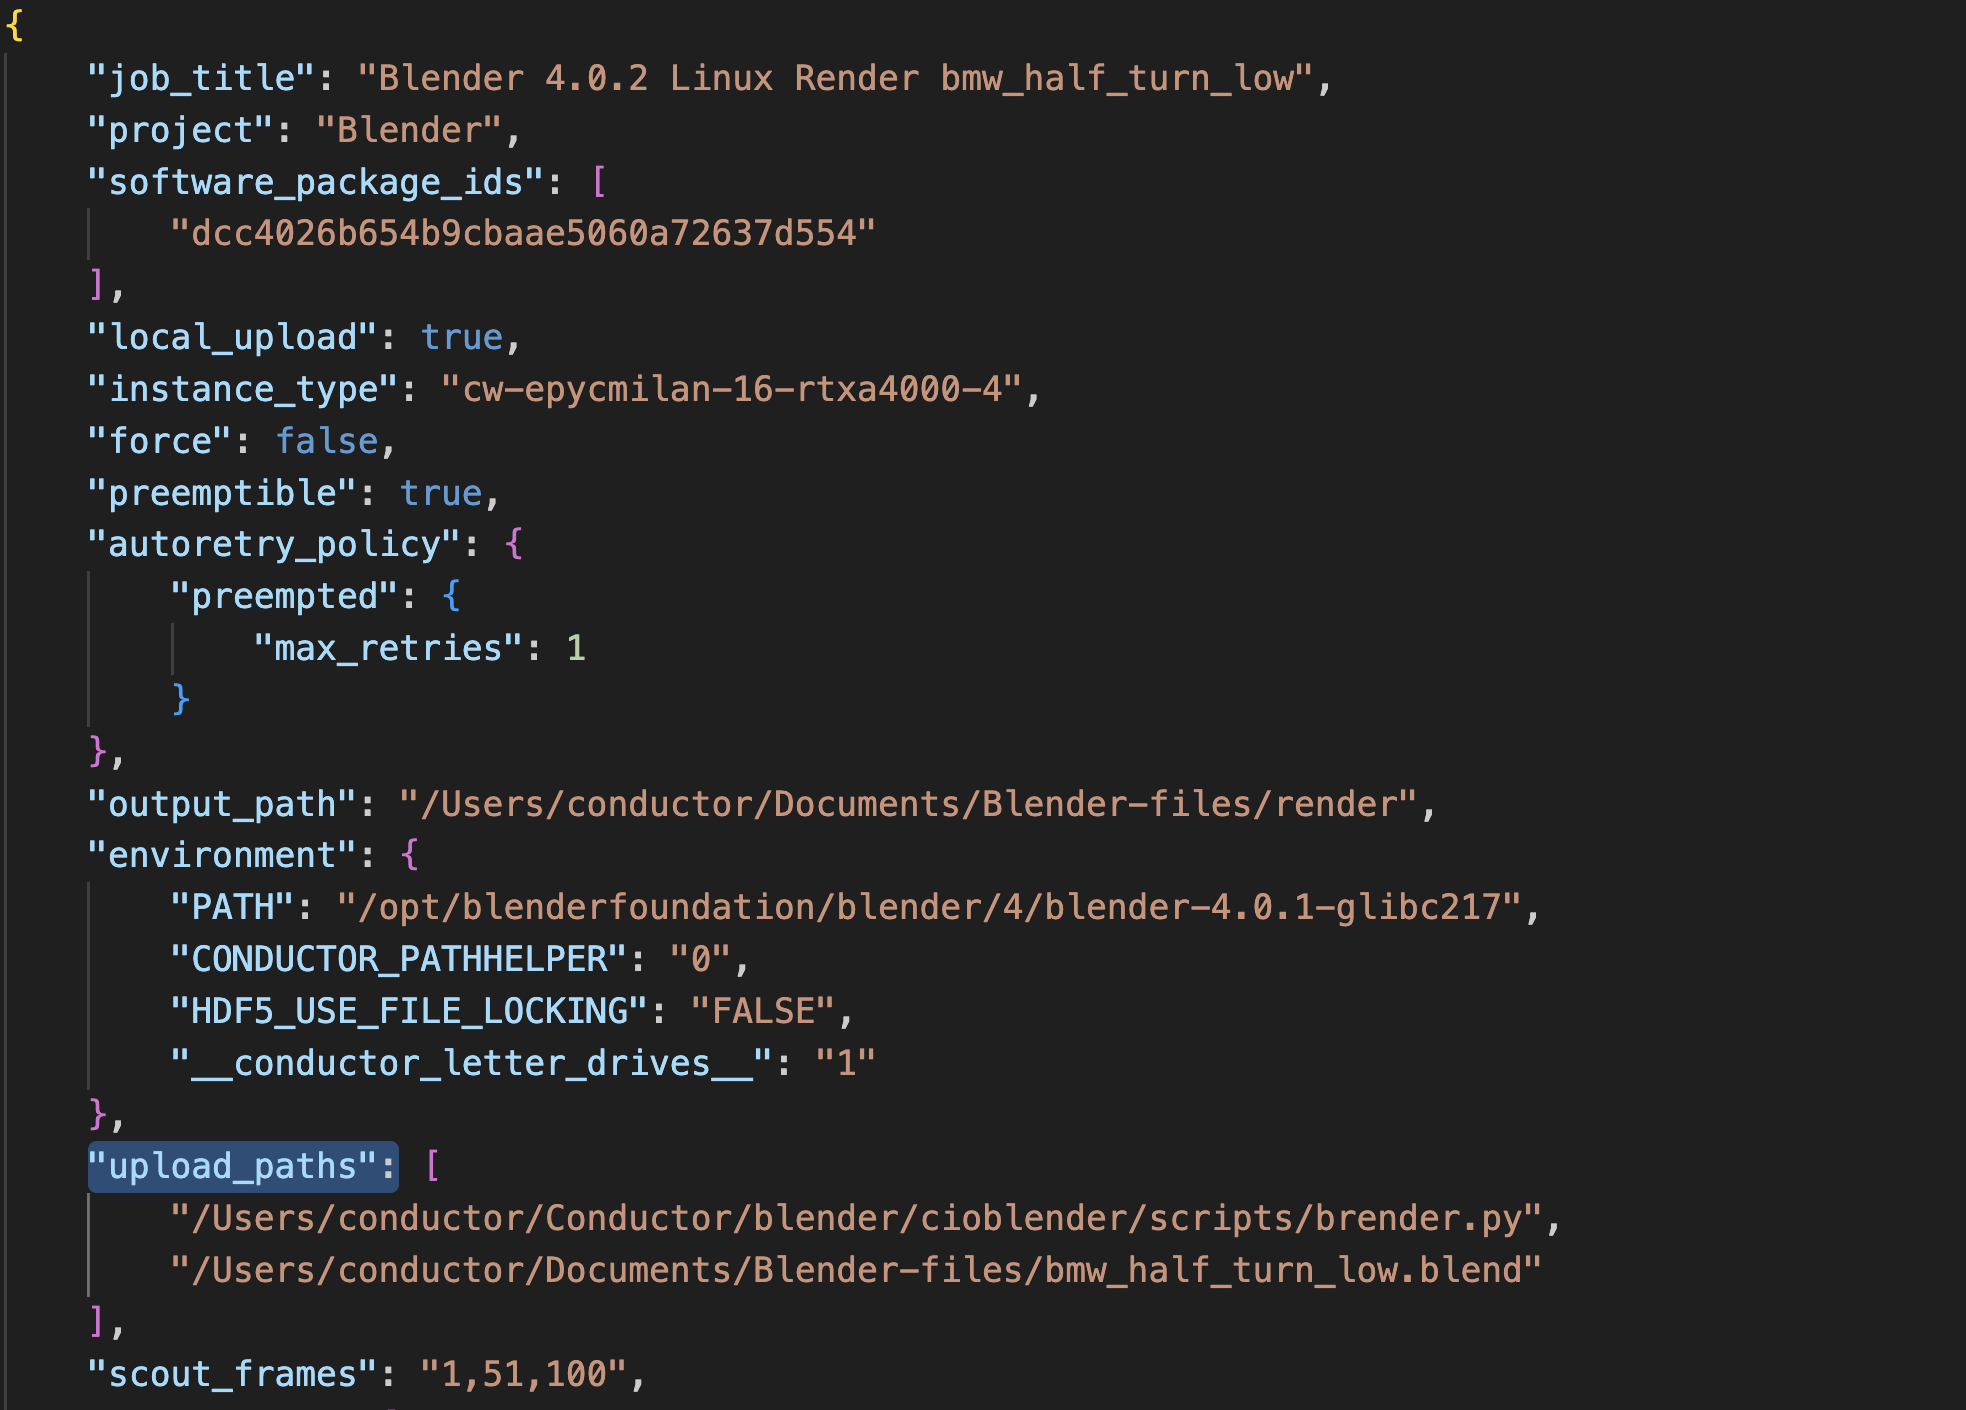
Job Preview
Validate and Submit
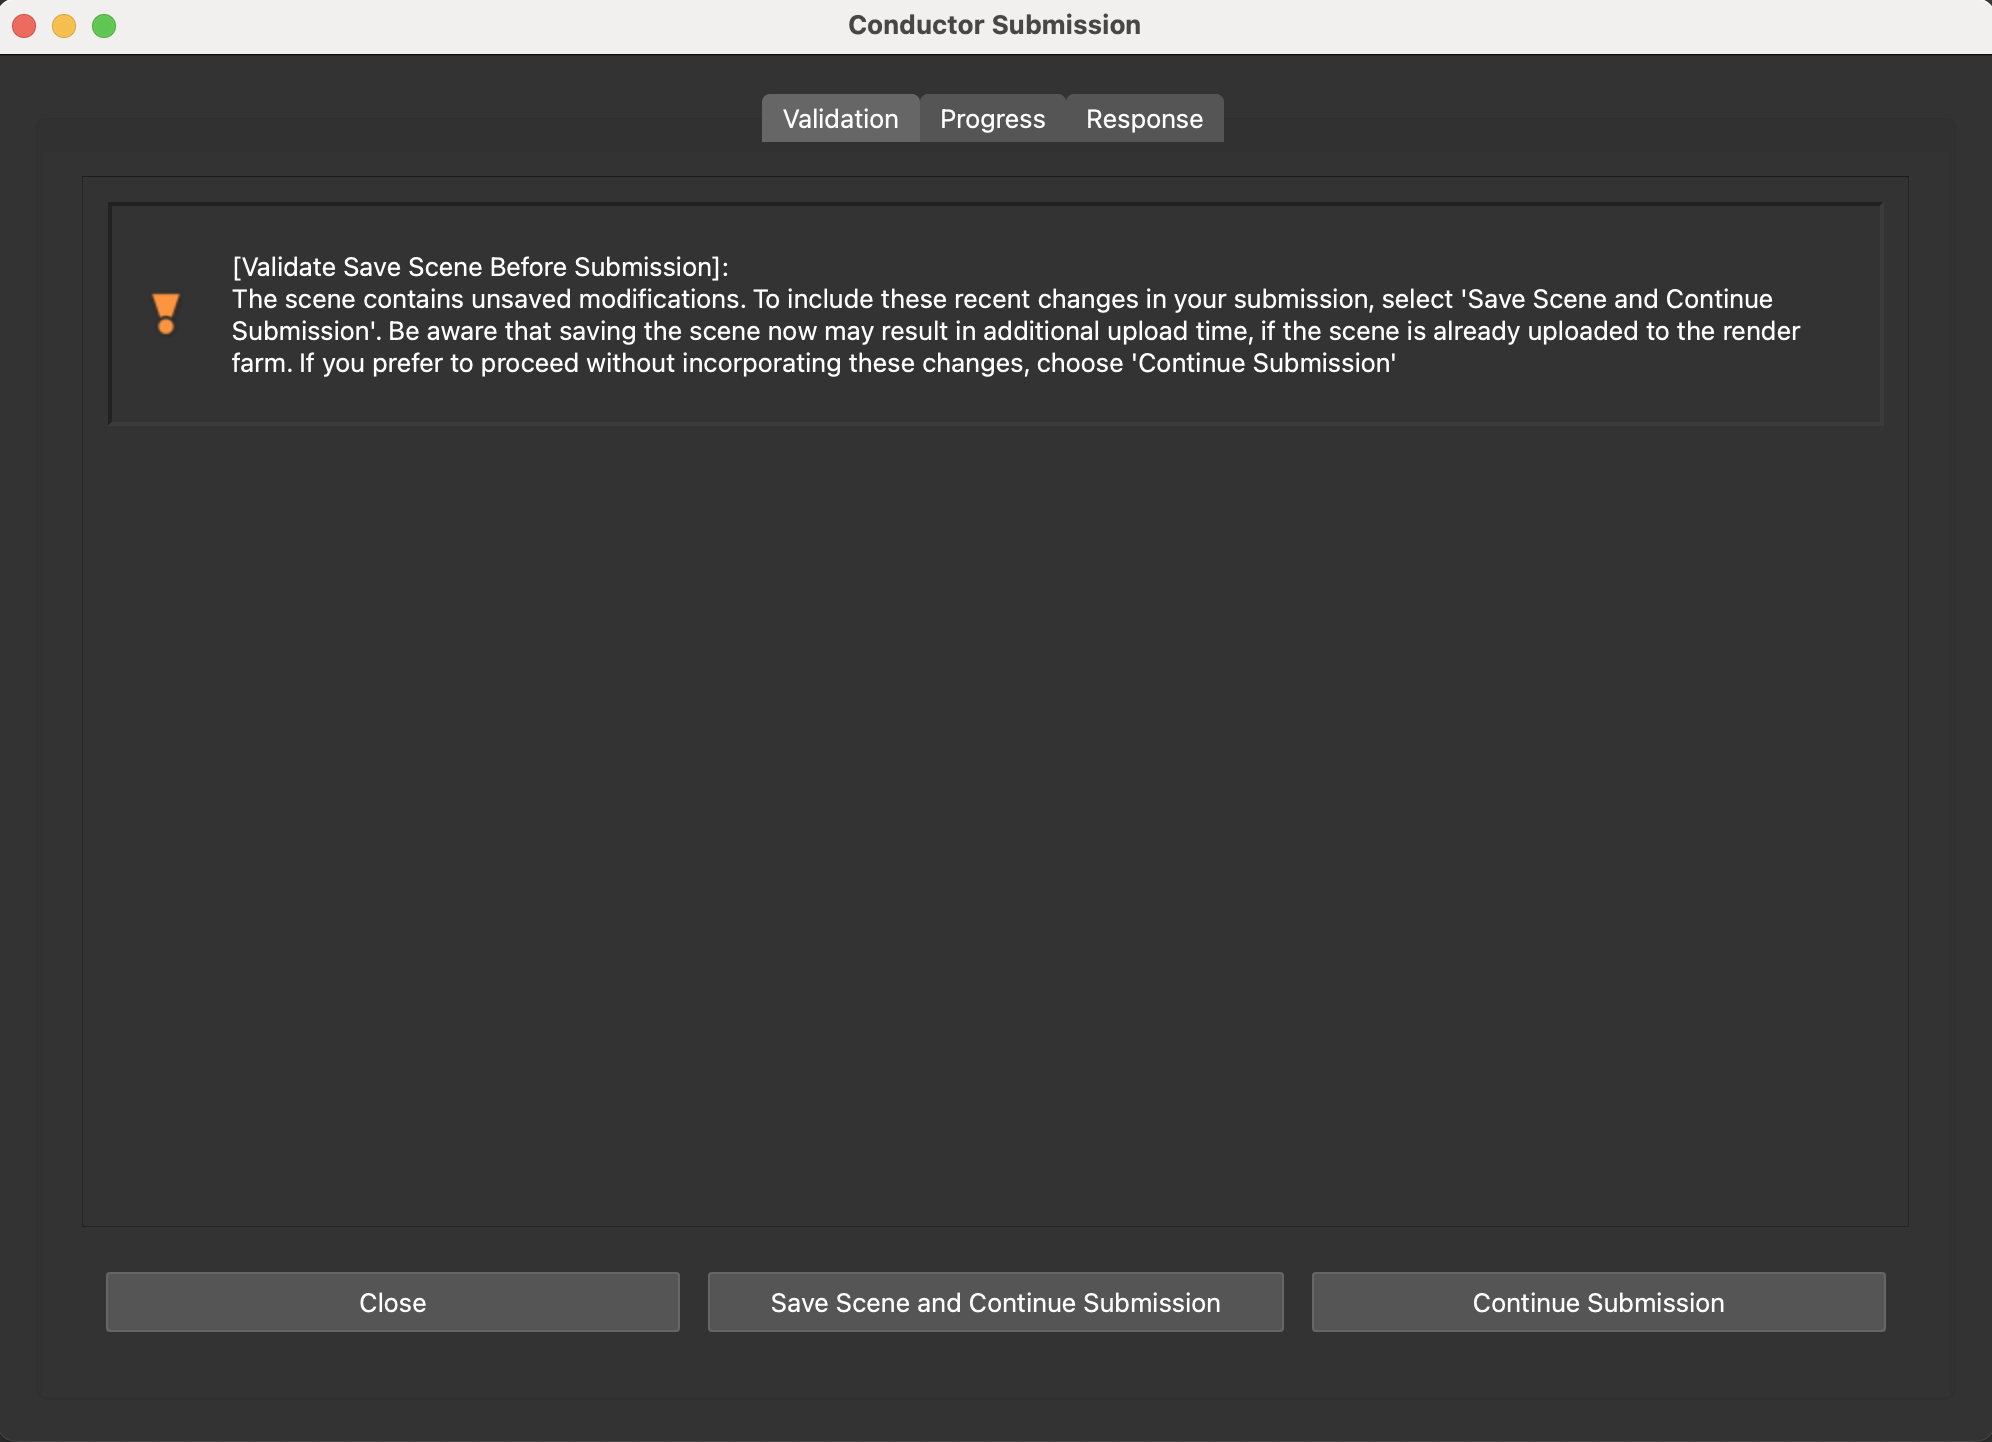
Hit the Submit button to dispatch your job to the conductor. We first perform an in-depth review of your scene to identify any issues that could potentially cause rendering failures.
If any critical problems are found that could jeopardize the submission, errors will be flagged in the submission dialog, pausing the process. More commonly, you might see warnings or informational alerts rather than direct errors. These notices will be outlined in a dialog window, giving you a rundown of all the detected issues. Despite these warnings, you will have the choice to continue with your submission if you choose.
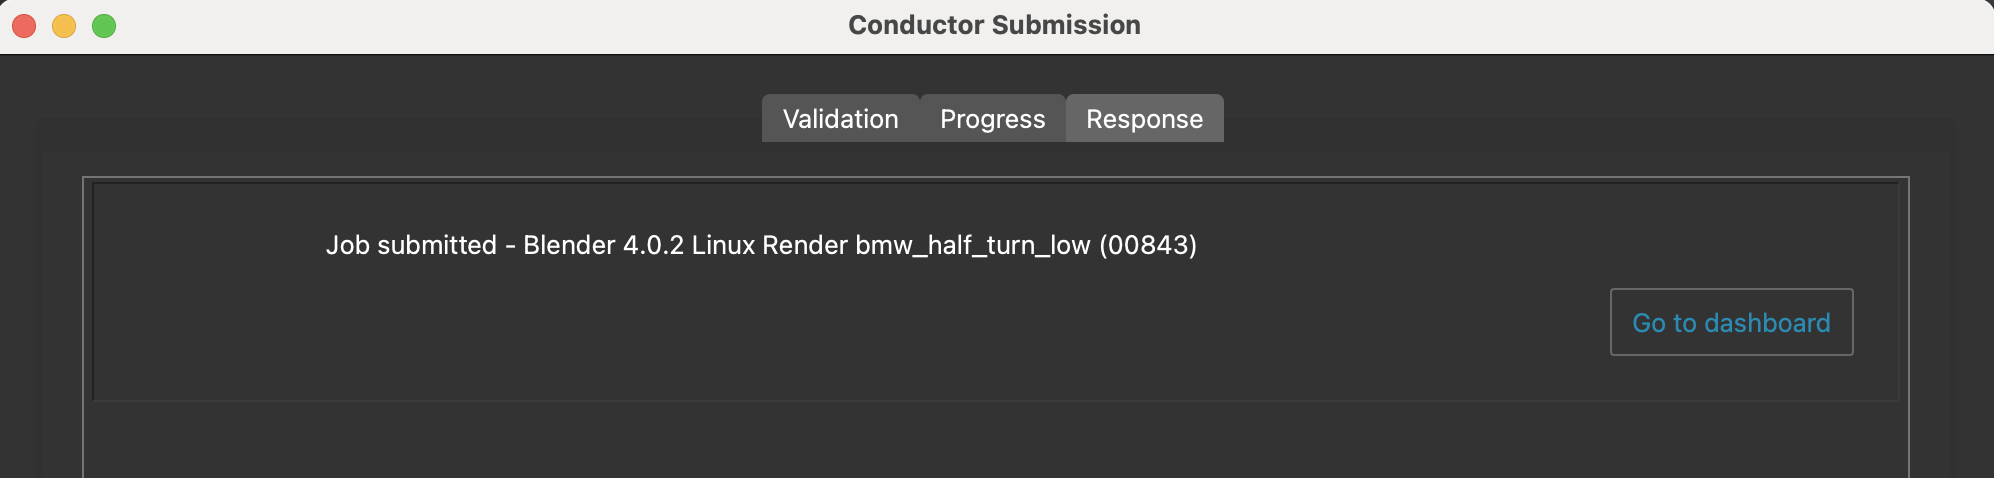
Example of a successful submission:
Download finished files
As tasks finish, you can download your images via the command-line tools or open the Downloader page in the Companion app.
Done
Be sure to visit the Blender reference page for more info.
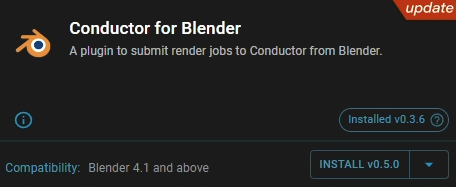
Upgrade the Plugin
Upgrades become available for our plugin offering to support the latest Blender versions. There are two main methods to upgrade the Conductor for Blender plugin. Ensure Blender is closed before upgrading for best results.
Companion App
Express install the plugin upgrade through the Companion App. A banner should appear in the top right corner to indicate there is an update available.
Click the INSTALL button on the bottom, right-hand side. The Companion App seamlessly handles installation on behalf of the user.
PyPi
For advanced users, the cioblender repo is available on PyPI. Visit Conductor for Blender for details.
To install the latest version.
pip install --upgrade cioblender --target=$HOME/Conductor
To install a specific version, for example 0.1.0.
pip install --upgrade --force-reinstall cioblender==0.1.0 --target=$HOME/Conductor
Then setup the Blender module.
python ~/Conductor/cioblender/post_install.py