Houdini Solaris USD Rendering
In this guide, you'll learn how to submit Solaris USD projects to Conductor efficiently.
This tutorial should get you going quickly. Please check the Houdini reference page and the Houdini tutorial page for a detailed description.
Houdini Solaris USD
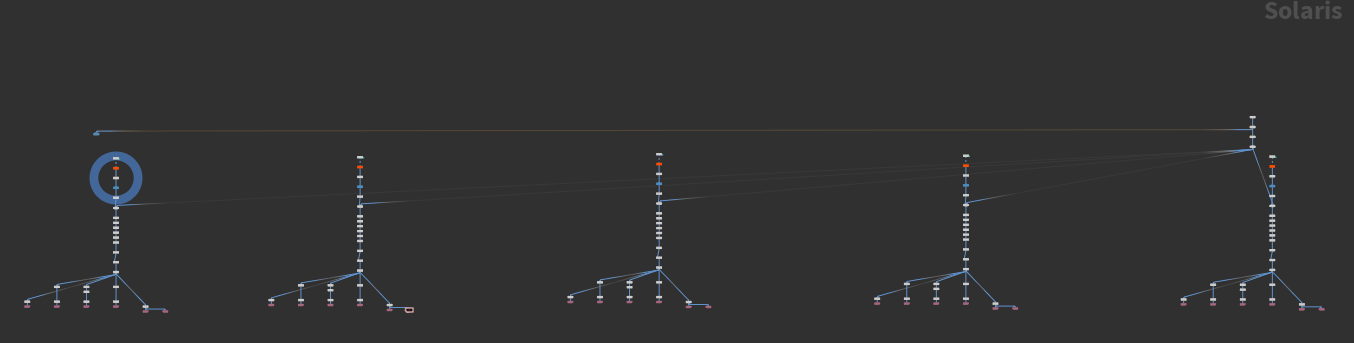
In Houdini Solaris USD, a shot often includes multiple render layers or USD render ROPs. These are usually rendered separately and then combined using software like Nuke. A Houdini Solaris scene can have multiple shots, each with 4-6 render layers or ROPs. Conductor simplifies rendering for such complex scenes.

Rendering with Conductor
Let's go through an example to demonstrate rendering of render layers using Conductor in Houdini Solaris USD:
- Step 1: Create a scene in Houdini Solaris Stage with at least two render ROPs.
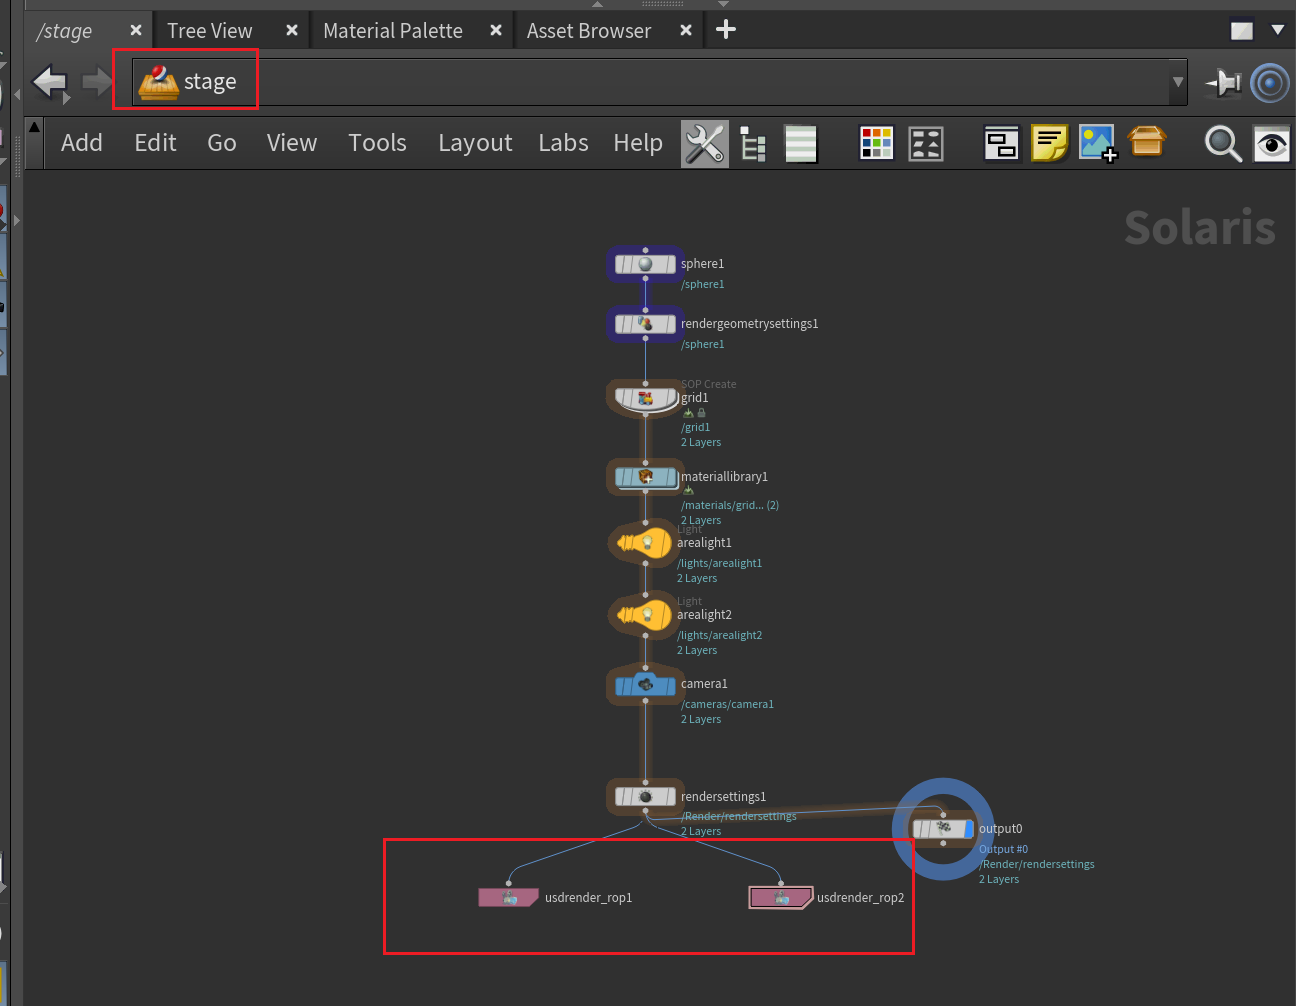
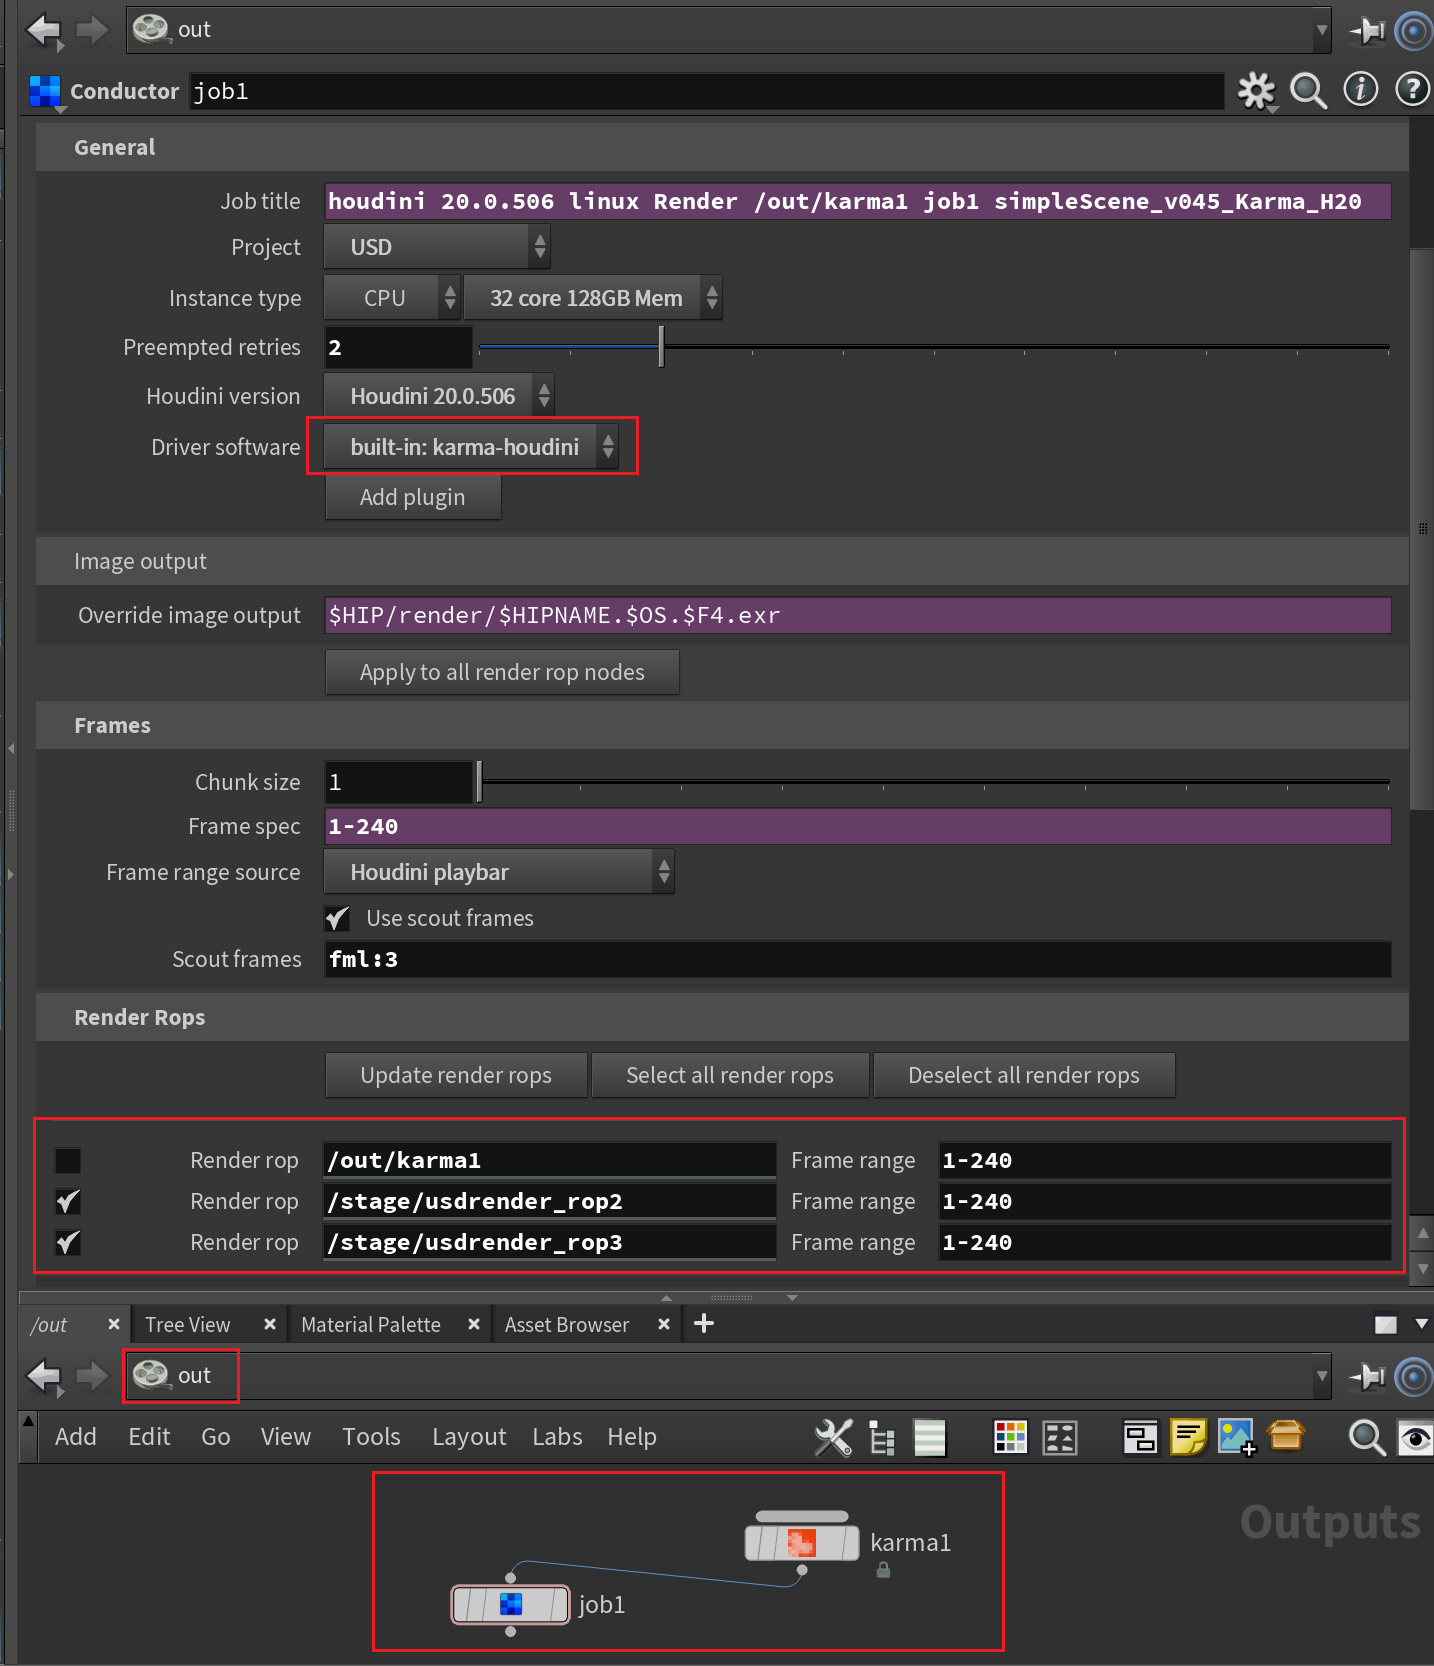
- Step 2: In the out workspace, create a Conductor node and connect it to a Karma node, Houdini Solaris' renderer. Click the Conductor node and hit Connect to link to the Conductor server.
- Step 3: In the Render Rops section, each render ROP is a row. The first row is for Karma, rendering a composite of all ROPs. Other rows represent individual ROPs.
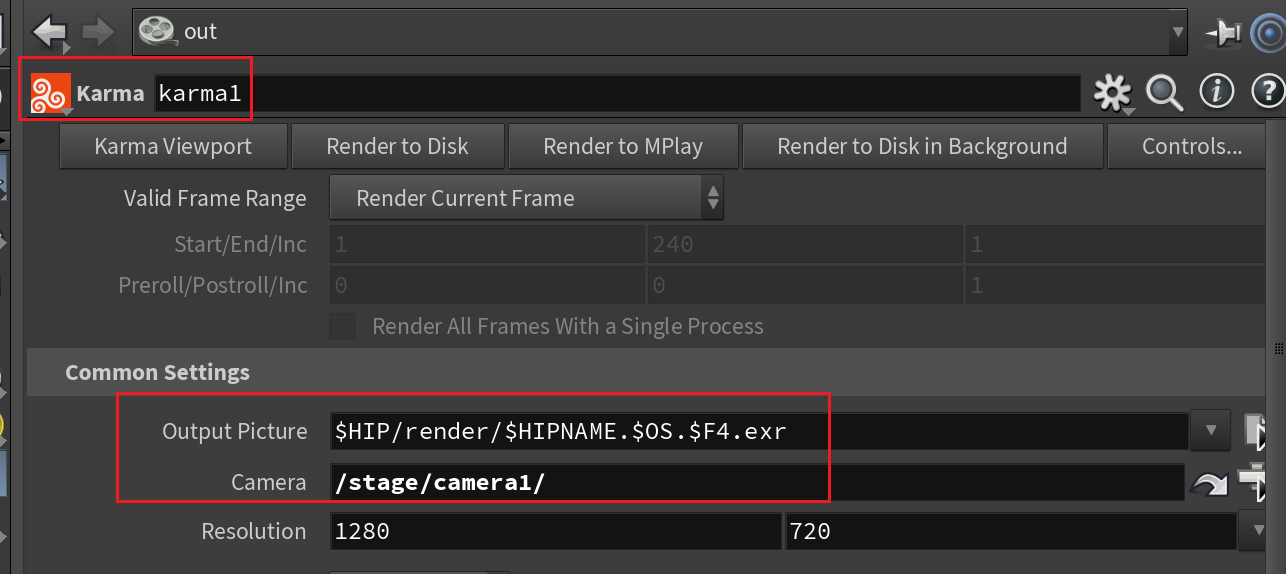
- Step 4: Double-click Karma to edit parameters, like Output Picture path and Camera (e.g., "/stage/camera1").
Configure your rendering setup within Conductor efficiently for farm submission.
Other Renderers
Conductor supports renderers like RenderMan, Arnold, and RedShift, alongside Karma. Choose the renderer that suits your project.
Be sure to visit the Houdini reference page the Houdini tutorial page for more info.